
Step: 1
You will need to sketch out a rough guide for the portrait. It can be really rough line work, just to give you enough indication on the overall composition of the elements, like the placement of the eyes and nose and the shape and movement of hair.

Step: 2
With the rough sketch done, we can start brushing in the shadings. Using the Pen tool (P), create a path around the face shape and use the shape as a mask for your shadings. Using a soft brush, start to brush out the dark areas of the face. Do the same for the rest of the sections.

Step: 3
Proceed onto the hair. The lighter the hair, the smaller your brush needs to be. Create a path around the sunglasses using the Pen tool – make sure you include the frame as well as the lens. Using the shapes as masks, use a soft black brush to shade in the area. Similarly, use a white brush to apply the light reflections.
Step: 4
Now that we have a finished sketch, we can start colouring the image. By having a completed sketch, half the work is already done. Begin by creating a new canvas with a gradient background. Use a green to brown gradient as shown. Next, import the black and white shadings into the canvas.

Step: 5
Start converting the shadings to colour using the hue and saturation settings as shown. Set the dark shadings layers to Multiply to blend against the skin tone. Add tints to the face by brushing different colours near the edges of the face. They will be masked within the face shape.

Step: 6
Now add some colour to the nose. With the black shadows’ blending mode set to Multiply, apply a Gaussian blur with a Radius of 2 pixels to soften the nostrils path. Using a soft brush, add some shine on the tip of the nose as well as the bottom.

Step: 7
Block the eye with a light grey base colour. Apply shadins with a Multiply blending mode and highlights with Overlay. Fill in the pupil with details and light reflections. Add subtle details to the eye such as glittering shadows by using a white brush.

Step: 8
Apply some makeup by brushing pink, grey and green on the side of the eye and set the layer mode to Overlay. Duplicate this whole group and flip it to form the right eye. Take note of details such as the direction of light reflection
to avoid being too symmetrical.
to avoid being too symmetrical.

Step: 9
Using a soft brush, fill in the lips with a pinkish base colour. Build up details such as a lipgloss effect by brushing over white colour and carefully erasing lines using the Eraser tool. Set this layer to Overlay. Add some tints to the lips by experimenting with different coloured brushes and set their layers to Multiply, Soft Light or Overlay.

Step: 10
Add some subtle details to the face, such as skin textures, by using a white brush. Turn on the Airbrush setting and set the Opacity to 70% and the Flow to 70%. Select Scattering in the Brushes panel and set the Scatter to 393%. Set these layers to Soft Light with the Opacity at 60%.

Step: 11
Block out the hair with a base colour, then create shadows using a layer set to Overlay and highlights layer using Overlay and Soft Light. Add some tints to the outer hair by brushing in some orange and the inner hair with dark green. Set the blendings of these layers to Soft Light.

Step: 12
Create the earrings using the Pen tool (P). Enhance them by applying an Inner Shadow effect. Set the colour to white, the blending mode to Color Dodge, the Opacity to 100%, the Distance to 5px and the Size to 20. Mask off unwanted areas using a soft brush.

Step: 13
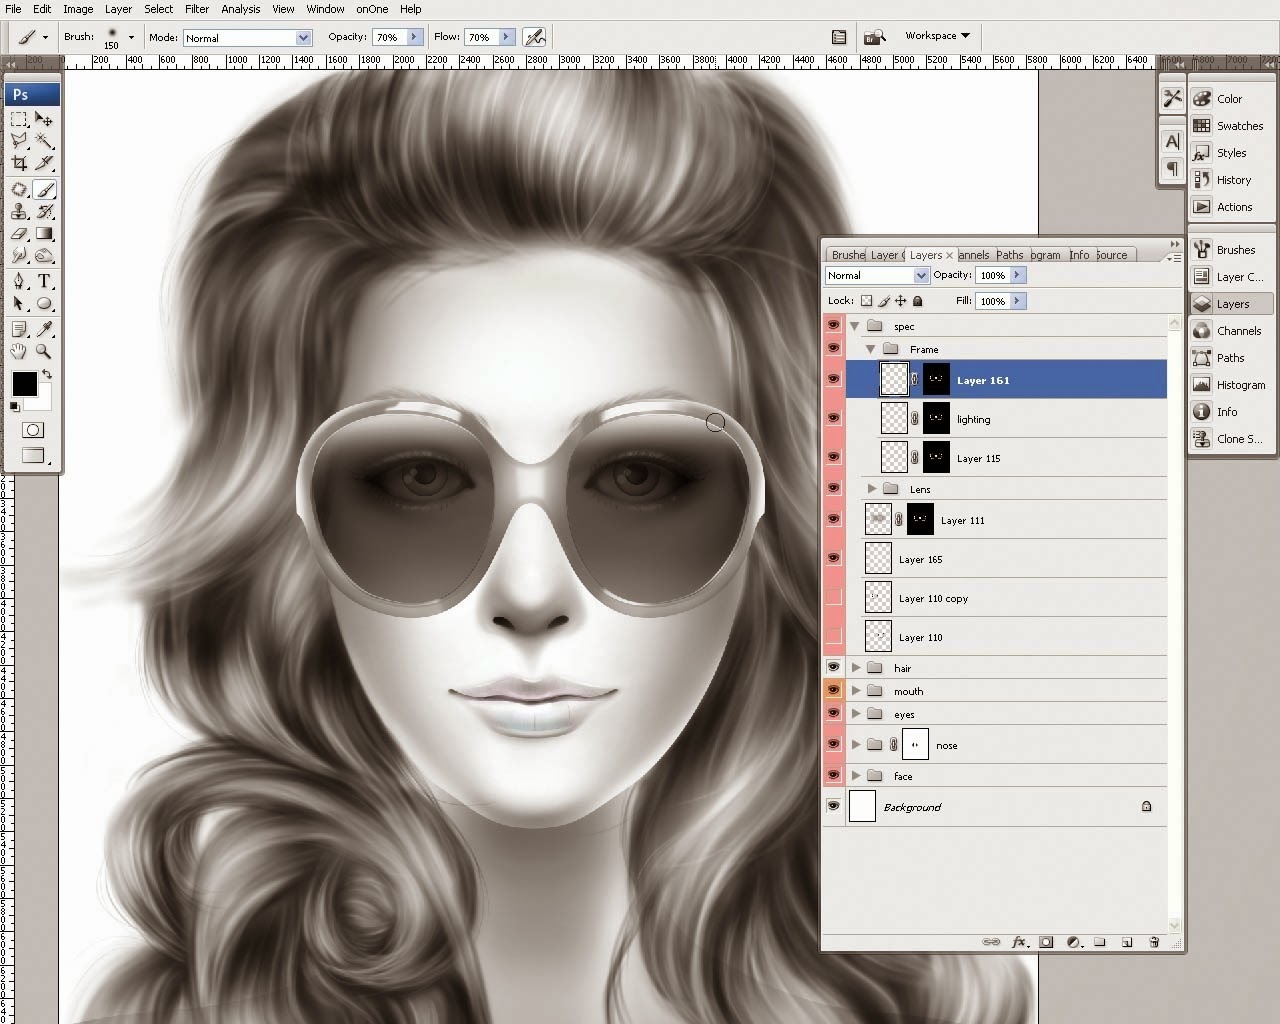
Next, create the sunglasses by blocking them with a base colour. Blend in the highlights and shadows using blending modes such as Overlay or Soft Light. Create the shadow of the sunglasses on the face by applying a Drop Shadow effect (right-click the layer and select > Blending options > Drop Shadow). Set the Blend mode to Overlay, the Opacity to 100%, the Distance to 2, the Size to 11 and mask off unwanted shadows.

Step: 14
Now add some lenses to the sunglasses. Use a colour gradient as the lens colour. Set it to Pin Light, Opacity 85%. Darken the lens area slightly. Next, create rectangular-shaped reflections and blur them using the Gaussian Blur filter. Distort them slightly using the Warp tool. Experiment with layer modes to blend in the reflections.
.jpg)
Step: 15
Apply some tint by overlaying magenta onto both the frame and lens. Adjust the overall colours of the portrait by using the following Layer Adjustments: Saturation -20, Levels 33, 1.00, 212. Add a Cooling Filter (80) on top. Create a gradient with the layer mode set to Soft Light and Opacity 50%.

Step: 16
Finally, take a break from your work and revisit it later with fresh eyes. You’ll begin to see some of the things that weren’t visible to you before and other ways to improve your creation, for example, adding other elements like the bars to stylise the portrait.

Author: KittoZutto
http://www.digitalartsonline.co.uk/tutorials/photoshop/80s-airbrush-effects/
